
Flood Damage Repair Auckland: The Post-Restoration Repair Guide
Last updated:
Quick answer: Flood damage repair Auckland is the work that happens after the restoration company finishes drying your home — gib replacement, flooring, painting, plumbing fixes, electrical re-certification and insulation upgrades. Most repairs run 2–6 weeks and need multiple trades coordinated through your insurance scope of works.
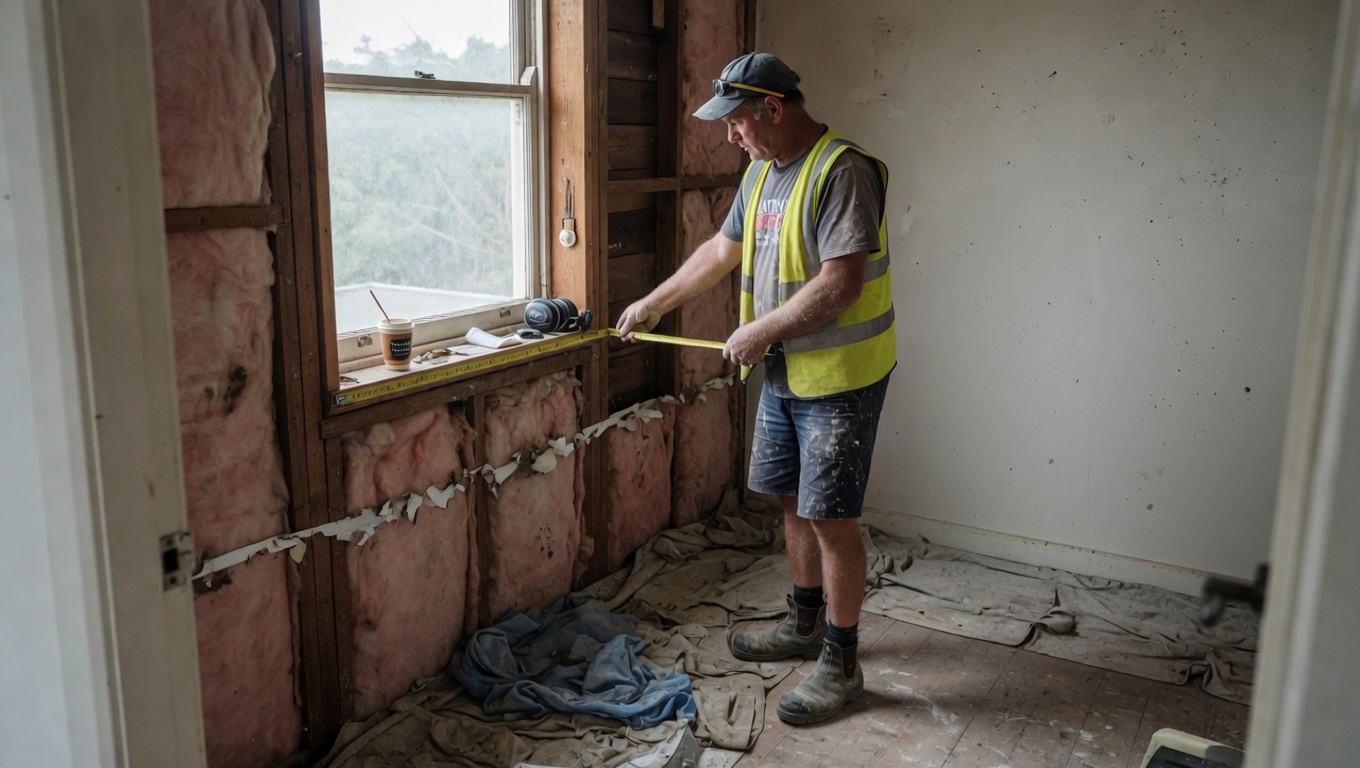
You’ve had a flood. Could be a burst pipe at 3am, a tenant’s washing machine that gave up, a roof leak that quietly soaked the ceiling cavity for a fortnight before anyone noticed, or one of the southerlies that punches stormwater up through Auckland’s gully traps. The restoration company has been in. They’ve extracted the water, run the dehumidifiers for a week, and the house is dry. Now they’re packing up. And you’re standing in a half-stripped room looking at framing, exposed underlay, and bubbled paint, wondering who you call next.
Free cost calculator
How much will your project cost?
Get an instant Auckland price range for your project — no details required to see it.
This is the part nobody writes about.
The restoration specialist does extraction and drying. They’re not builders. If you are earlier in the process than that and the water is still being dealt with, our guide to water damage restoration for Auckland homes covers the drying stage; this article picks up where that one stops. Once your moisture meters read clear, their job is done and they hand you back a house that’s dry but still wrecked. The actual flood damage repair work, the gib, the flooring, the painting, the electrical safety check, the plumbing, sits with a different trade entirely. And finding someone who can coordinate all of those trades at once, while your insurance assessor is asking for quotes, is where most Auckland homeowners get stuck.
This guide walks you through what happens between the restoration tech leaving and your home being fully back to normal. We’ll cover the post-flood repair sequence, what insurance and the Natural Hazards Commission actually pay for, how to negotiate the scope of works so you’re not paying out of pocket for things insurance should cover, and the replacement standards that protect your home’s value long-term. We’ve coordinated this kind of multi-trade repair work across Auckland for years — for owner-occupiers, for landlords during turnover, and for property managers chasing insurance deadlines. If you want to see how we approach it, the water damage repair side of our Auckland maintenance work handles the whole sequence under one job number.
The First 48 Hours After the Restoration Tech Leaves
Let’s start with what’s actually happening when the restoration company packs up. You’ll know they’re done when the technician hands you a final moisture reading sheet and removes the air movers and dehumidifiers. The walls, subfloor, and any affected timber framing have been read with moisture meters and confirmed at acceptable levels. For timber, most restoration companies work to a benchmark around 15% moisture content, alongside dry-line readings on any gib that hasn’t already been cut out. Ask which benchmark they used and get it in writing.
What they’ve done: water extraction, structural drying, antimicrobial treatment on affected surfaces, and removal of materials that couldn’t be saved — typically wet carpet and underlay, sometimes the bottom 600mm of gib if water sat against the walls, occasionally insulation if it got wet and compressed.
What they haven’t done: any rebuild work. Not a stick of new gib. No paint. No flooring. No electrical. No plumbing repair beyond emergency isolation. They’ve stabilised the house — that’s the brief. The repair work is a different job, with a different trade, and almost always a different invoice on your insurance claim.
What you should be doing in those first 48 hours
Three things, in this order:
First, walk the house with the restoration tech’s final report in your hand. Take photos of every affected area, every cut-out, every damaged item. Date them. Your insurance assessor will want these, and you’ll want them for your own records when the repair quotes start coming in. Water damage is one of the highest-volume domestic claim types in New Zealand, and the homeowners who document properly settle faster. Your photos are the difference between arguing about what was damaged and simply showing it.
Second, get the cause repaired before any cosmetic work begins. If it was a burst pipe, that pipe needs replacing or repairing. If the hot water cylinder failed, that’s a replacement decision, and our hot water cylinder replacement cost guide covers what that runs in Auckland. If a roof leak caused the damage, the roof gets sorted before anyone touches the ceiling. We deal with the diagnosis side of that in our guide to leaky roof repair in Auckland. There’s no point putting new gib up if water can come straight back through the same fault. This is the most common mistake we see — owners rushing the cosmetic repair before the source is solved, and then discovering six months later that the leak is still active.
Third, start getting repair quotes. Your insurance assessor will usually ask for one or two quotes from licensed builders or registered tradespeople. Most assessors will accept a single quote from a multi-trade contractor who can handle gib, paint, flooring, plumbing, and electrical under one scope — which saves you a lot of running around.
💡 Property tip: Ask the restoration company for written confirmation of the final moisture readings and a copy of their job report. Your insurer and your repair contractor will both want it, and the report becomes part of your property’s maintenance history if you ever sell.
What’s actually been removed — and what’s left
In a typical Auckland flood event, say a burst pipe in a Mt Albert villa or stormwater ingress in a New Lynn townhouse, you can expect the following to be gone by the time the restoration tech leaves: all carpet and underlay in affected rooms, the bottom 600–900mm of gib on any wall where standing water touched it, any soaked insulation in those wall cavities (batts pulled out and binned), and any damaged skirting boards.
Still in place but needing assessment: timber framing (usually dries fine but needs sign-off), subfloor boards (often saveable), electrical wiring inside affected walls (almost always needs an electrician to check and re-certify), plumbing inside those walls, and the ceiling above if water came through from above.
Likely fine: anything more than 1.5 metres away from the water source, anything in adjacent rooms that wasn’t directly affected, and most fittings (doors, windows, joinery) provided they didn’t sit in standing water.
This is the moment to know what you’re looking at. The next four weeks are about putting it all back — in the right order, to the right standard, with the right paperwork.
The Post-Restoration Repair Sequence, Week by Week
This is where most online guides fall short. They’ll tell you “call a builder”, but they won’t tell you what order the work actually happens in, or how long each stage takes, or where the bottlenecks are. Here’s the realistic sequence for a typical Auckland post-flood repair on a residential property, based on the way we coordinate this work through the Superior Construction Group trade network.
Week 1: Sign-off, Plumbing and Electrical
The first week after the restoration tech leaves is structural and safety work. Nothing cosmetic happens yet. Your builder or property maintenance contractor walks the house with you and the restoration report, marks up every cut-out and every damaged area, and writes the scope of works. If there’s any structural concern, a flooded subfloor that has left bearers sitting in damp ground being the obvious one, a Licensed Building Practitioner may need to sign off on the structural integrity before anything else goes ahead. The Building Performance team at MBIE sets out exactly when LBP work is required, and any structural repair touching load-bearing elements needs LBP sign-off.
Plumbing comes next. Whatever caused the flood gets fixed properly: burst pipe, cylinder failure, leaking dishwasher feed. Not patched. Replaced. Pressure-tested. Documented. If pipes are buried in walls that are about to be re-gibbed, this is also the chance to upgrade any tired sections that were borderline. Cheaper to do it now than to break open a freshly painted wall in two years.
Electrical is week one too. Any wiring that sat in water needs to be inspected by a registered electrician. In most cases the wiring itself is fine, because modern PVC-sheathed cable handles brief submersion, but the junction boxes, outlets and switches that got wet are usually replaced. The electrician issues a Certificate of Compliance for the prescribed electrical work, and your insurer will want a copy. Our guide to the electrical Certificate of Compliance explains what the document covers and the timeframes it has to be issued in. If the wiring is original and the flood has opened the walls anyway, that is also the cheapest moment to look at a partial or full rewire.
Week 2: Gib, Insulation and Ceilings
Once plumbing and electrical are signed off, the walls can go back together. New insulation goes in first — this is the moment to upgrade to current Healthy Homes-grade R-values even if you’re not renting (more on that in section four). Then new gib is fixed, stopped, sanded, and prepped for paint. Ceilings repaired or replaced where needed.
Typical cost ranges for this stage in Auckland: a single damaged wall section ($800–$2,000 fully stopped and ready to paint), a full room of gib replacement ($3,000–$7,000), full ceiling replacement ($1,500–$4,000 per room depending on size). These figures move around based on the height, the access, and whether plaster cornices need to be matched on older villas.
Week 3: Painting and Flooring Prep
Paint goes on the new gib and any affected adjacent surfaces. Two coats minimum on new gib, ideally three. Skirting boards reinstated. Then the subfloor is prepped for new flooring — checked for level, treated if there’s any residual moisture issue, vapour barrier replaced if needed.
If you’re getting paint redone across whole rooms (which insurance usually covers if the damaged area is more than a small patch, because matching old paint to new is nearly impossible), this is when colour and finish decisions matter. We handle the make-good painting inside a flood repair so the paint dries hard before the flooring comes in, which matters more than people realise: soft paint marks easily under heavy boots and stepladders. If the flood has given you a reason to repaint the whole house rather than the affected rooms, that is a job for our sister brand Superior Painters.
Week 4: Flooring, Fixtures and Fit-off
New flooring goes down — carpet, vinyl, laminate, or timber depending on what was there and what’s being replaced. Insurance will almost always cover like-for-like replacement, but they won’t usually pay for an upgrade unless you negotiate it in your scope of works. Skirting reinstated against the new flooring. Fixtures, fittings, and any door adjustments completed. Final clean. Sign-off.
For larger jobs, say a Henderson home where the whole open-plan living, kitchen and laundry were affected, this timeline stretches to 5–6 weeks. For smaller jobs, like a single laundry room burst pipe in a Mt Eden bungalow, it can be done in 10–14 working days. The key driver is how many trades need to coordinate, and whether anything is on backorder.
💡 Property tip: Ask for a written sequence of works with target dates before any tools come out. A good repair contractor will give you one. It lets your insurance assessor track progress, and it gives you a realistic timeline to plan around — especially if you’ve had to move out during the work.
Flooded Subfloors, Piles and Foundations: The Repair Nobody Quotes For
Every quote you get will price the gib, the paint and the flooring. Far fewer will price what happened underneath the floor, and on Auckland’s older timber-framed housing stock that is where the expensive damage hides.
If water sat on the ground under an enclosed subfloor, the drying report on your walls tells you nothing about the state of your bearers, joists and piles. Air movers upstairs do not dry a crawl space. Water drains out of a subfloor slowly, the ground underneath holds moisture for weeks, and the timber sitting on top of it keeps reading high long after the interior is signed off.
What actually happens to a timber subfloor after a flood
Three things, in rough order of seriousness.
Sustained moisture in the ground under the floor keeps the relative humidity in the crawl space high. That is the condition borer and decay fungi need. A single flood event rarely rots a bearer on its own; a flood followed by six months of a damp, poorly ventilated subfloor can start the process.
Second, the ground moisture barrier. If there was one, floodwater and silt will usually have lifted, torn or buried it. If there wasn’t one, the flood has just demonstrated exactly why the requirement exists. Reinstating a barrier runs $600 to $1,500 depending on how much crawl-space access you have, and it is the single highest-value thing you can do under a flooded floor.
Third, movement. Timber piles that have been standing in saturated ground can settle, and concrete piles can shift if the ground around them has been scoured. That shows up as a floor that has developed a slope or a spring, doors that suddenly bind, or a hairline crack opening in a plaster ceiling. Floor movement is a structural question, not a cosmetic one.
Where a Licensed Building Practitioner comes in
Repairing or replacing structural elements is restricted building work. Re-levelling a floor, replacing a bearer or a joist, and replacing piles all sit on the structural side of the line, and that means Licensed Building Practitioner involvement and, depending on the scope, a building consent from Auckland Council. Replacing a few floorboards does not. We are not going to guess which side of the line your job falls on from a description: get an LBP to look at it, and let the council confirm the consent position in writing. That is the only answer that protects you at resale.
What to ask for in the subfloor part of your scope
- Moisture readings taken under the floor, not just in the rooms, with the readings recorded and dated
- Ground moisture barrier assessed and reinstated where the subfloor is enclosed, with the specification confirmed in writing
- Silt and debris removed from the crawl space, because silt holds water and blocks airflow
- Subfloor vents checked and cleared so the space can actually dry; blocked vents are common and cheap to fix
- Bearers, joists and piles inspected for decay, splitting and settlement, with anything structural referred to an LBP
- A floor level check if anyone in the house has noticed a slope, a bounce, or doors that have started to stick
- Underfloor insulation replaced, not dried and put back. Wet batts compress, lose their R-value and stay damp
💡 Property tip: Get the subfloor inspected before the new flooring goes down, not after. Once the floor is closed up, every one of the checks above costs three times as much and someone has to lift the brand-new carpet to do it.
Subfloor moisture is also the most common driver of the mould complaints that arrive months after everyone thought the job was finished. If you are letting the property, our landlord guide to condensation and mould covers where the liability sits when a tenant raises it.
Insurance, the NHC, and Your Scope of Works
This is where money gets won or lost. Most Auckland homeowners settle for whatever their insurance assessor’s first scope of works contains — and then find out three months later that they’re paying $4,000 out of pocket for things that should have been on the claim.
The scale is not hypothetical. The Insurance Council of New Zealand’s provisional data for the Auckland Anniversary weekend flooding of 27 January to 2 February 2023 recorded 47,936 claims worth just over $1 billion, including 26,093 home claims worth $480.3 million and 10,125 contents claims worth $85.1 million. West, Central and South Auckland carried much of it. The pattern in the months afterwards was consistent: homeowners who actively negotiated their scope of works settled better than homeowners who waited for the assessor to dictate it.
What’s NHC and what’s your private insurer?
This is genuinely confusing, and most Aucklanders still call it “EQC” even though the body changed names. As of 1 July 2024, the Earthquake Commission became the Natural Hazards Commission under the Natural Hazards Insurance Act 2023. For residential flood damage, the line is roughly this:
“The cause of the flood usually decides who pays. Natural hazard, meaning a river breaking its banks, a slip after heavy rain, surface water in a declared weather event, and the Natural Hazards Commission may pick up part of the residential damage, mostly on the land. Burst pipe, roof leak, internal plumbing failure, anything originating inside the property, and that is your private insurer. Call both and let them sort the split between themselves. Don’t try to second-guess it.”
— Superior Property Services Team
For most domestic flood events in Auckland the claim sits with your private home insurer: burst pipes, hot water cylinder failures, roof leaks, dishwasher failures, washing machine connection failures. NHC involvement usually only kicks in after a declared natural hazard event, and even then the scheme’s storm and flood cover is largely limited to residential land, with the building damage running through your private insurer. The Natural Hazards Commission sets out what the scheme does and doesn’t reach.
What to add to your scope of works
Here’s where you save real money. The first scope your assessor writes will usually cover the obvious: damaged gib, damaged flooring, paint to affected areas. What it often misses, and what we routinely add when we’re writing repair quotes:
- Insulation replacement — even if only the bottom of a wall got wet, you usually need to pull the whole wall’s insulation. Like-for-like at the original R-value, or negotiate an upgrade to current standard.
- Painting to entire adjacent walls and the room’s ceiling — paint can’t be patched invisibly on a wall that’s a few years old. The damaged section gets repainted from corner to corner. Most insurers accept this if you push for it.
- Skirting and architrave replacement — usually pulled during gib repair, often warped or damaged, almost always written off as collateral.
- Electrical re-certification fees — the Certificate of Compliance is part of the repair cost, not a separate bill you absorb.
- Ventilation upgrades — if the flood was caused by or worsened by inadequate ventilation (rising damp behind a wall, condensation building up in a poorly ventilated space), an upgraded extractor fan can sometimes be claimed.
- Subfloor treatment — for older Auckland villas and bungalows with enclosed subfloors, post-flood treatment of the ground moisture barrier and any ventilation under the house is often missed.
Healthy Homes compliance note: Even if this is your owner-occupied home today, if you ever rent it out in future, your replacement insulation and ventilation will be assessed against the Healthy Homes Standards. Replacing to compliance now saves doing it twice: ceiling R 2.9, underfloor R 1.3, and extractor fans venting outside at 150mm duct or 50 L/s in the kitchen and 120mm duct or 25 L/s in the bathroom for units installed after 1 July 2019. See the full standards on tenancy.govt.nz.
Getting quotes the assessor will actually accept
Most Auckland insurance assessors will accept a single comprehensive quote from a multi-trade contractor — gib, paint, flooring, plumbing, electrical, fittings all priced under one scope. Some insurers will ask for two quotes. What they almost universally won’t accept is six separate quotes from six separate tradies that you’ve cobbled together yourself. The assessor wants one accountable party for the whole job, with one timeline and one set of contact details.
This is why “one call, all trades” matters more for flood repair than for almost any other property work. The pain of finding, vetting, scheduling and coordinating five or six independent tradies, while your house is half-stripped and your insurer is waiting on documentation, is the single most stressful part of the whole process for most homeowners we work with.
What Flood Damage Repair Costs in Auckland
Every figure below is a repair cost, not a restoration cost. The restoration company’s extraction and drying invoice is separate and usually goes straight to your insurer. These are the numbers for putting the house back together, and on a covered claim most of it is the insurer’s money rather than yours.
Your out-of-pocket is normally three things: your excess, anything the assessor declines, and any upgrade you choose over like-for-like.
| Scope | Typical Auckland range | What moves the number |
|---|---|---|
| Single damaged wall section, new gib fully stopped and ready to paint | $800 – $2,000 | Wall height, access, whether plaster cornices need matching on an older villa |
| Full room of gib replacement | $3,000 – $7,000 | Room size, ceiling height, number of penetrations and joins |
| Full ceiling replacement, per room | $1,500 – $4,000 | Span, whether cornices or a decorative ceiling have to be matched |
| Ground moisture barrier reinstated under an enclosed subfloor | $600 – $1,500 | Crawl-space height and access, how much silt has to come out first |
| Insulation upgrade above like-for-like, while walls are open | $1,500 – $3,500 | How many wall cavities are already open. This is the cheap window |
| The same insulation retrofit later, walls closed | $8,000 – $15,000 | Every wall has to be opened and reinstated. Same insulation, five times the labour |
| Single-room repair, all trades, start to finish | $5,000 – $12,000 | Laundry or bathroom burst pipe, 10 to 14 working days |
| Multi-room repair, open-plan living plus kitchen or bathroom | $20,000 – $80,000 | Cabinetry, flooring grade, and whether any structural work is involved |
The ranges are wide because flood repair scope is wide. Two houses with the same amount of water in them can differ by $30,000 once one has a flooded kitchen with custom cabinetry and the other has a laundry and a hallway.
What is worth noticing in that table is the fifth and sixth rows. The identical insulation upgrade costs $1,500 to $3,500 while the walls are open and $8,000 to $15,000 once they are closed. That single line is the strongest argument for making your upgrade decisions during the repair rather than promising yourself you’ll get to it later. For a broader view of what a house costs to keep in order year to year, our Auckland house repair cost guide puts these figures in context.
Don’t Just Put It Back the Same: Replacement Standards Matter
You’ve got a window here. Walls are open. Insulation is out. Wiring is exposed. Plumbing is accessible. The cheapest moment to upgrade anything is when it’s already in pieces.
Most insurance policies cover like-for-like replacement — what was there, replaced with the equivalent. If your 1970s ceiling had R 1.8 insulation, the insurer will pay for R 1.8 insulation to go back in. But you can usually pay the difference yourself to upgrade to current standard, and the cost difference is small while the wall is open. Once that wall is closed up, doing the same upgrade costs three to five times more.
Insulation: Go to the Current Healthy Homes Standard
Auckland’s Healthy Homes minimums are R 2.9 in the ceiling for insulation installed on or after 1 July 2016, and R 1.3 underfloor. For ceiling insulation installed before 1 July 2016 the test is thickness rather than R-value: at least 120mm, in reasonable condition. R 1.3 is the underfloor figure, not a ceiling allowance, and that mix-up is one of the most common landlord errors we see. Our Healthy Homes standards checklist sets out all five standards with the exact thresholds. Wall insulation isn’t currently mandated under Healthy Homes, but if your walls are open, this is the moment to put it in. A typical 3-bedroom Auckland home with wall insulation added during repair will see warmer winters, less condensation, lower heating bills, and a higher valuation if you sell.
Cost for upgrading insulation during a flood repair, while walls are open: usually $1,500–$3,500 over and above the basic like-for-like replacement. Doing the same retrofit on a closed-up house: typically $8,000–$15,000 because every wall needs to be opened and closed again. The maths is obvious.
Ventilation: Bathroom and Kitchen Extractors
If the flood involved the kitchen or bathroom, and a surprising number of Auckland flood claims involve a dishwasher feed, an under-sink burst or a leaking shower tray, the extractor fan is worth upgrading. For fans installed after 1 July 2019 the Healthy Homes ventilation standard requires a 150mm duct or 50 litres per second in the kitchen, and a 120mm duct or 25 litres per second in the bathroom, venting to the outside of the building rather than into the roof space.
An old 1990s bathroom fan vented to roof space (instead of outside) is one of the most common reasons we find moisture and mould issues during post-flood inspections. Replacing it with a properly ducted unit, vented through the soffit or roof to outside, is a couple of hundred dollars more than a like-for-like swap and prevents the next problem before it starts.
Water-Damaged Flooring: What Survives and What Doesn’t
Not everything on the floor is a write-off, and not everything that looks fine is salvageable. The rough rule is that anything with a paper or fibreboard core is gone, and anything solid has a chance.
Carpet and underlay that sat in floodwater get replaced, not cleaned. Underlay is the giveaway: it holds water like a sponge and stays contaminated even after the carpet above it looks dry. Restoration companies will sometimes save carpet from a clean-water burst pipe if they get to it within a day or two, but grey or storm water means both go.
Laminate is usually finished. The core swells at the joints, the edges lift, and it does not come back. Engineered timber depends on how long the water sat and how thick the wear layer is. Solid timber is the most likely survivor: it can often be dried in place, sanded and refinished, though it may cup for weeks before it settles and should not be sanded until the moisture content has stabilised. Vinyl planks and sheet vinyl frequently survive the water itself, but the problem is underneath, because water trapped between vinyl and the substrate has nowhere to go.
Tiles usually stay. What fails is the substrate and the grout, and a hollow-sounding tile after a flood means the water got under it.
If the floor is being replaced anyway, this is the moment to change grade rather than colour. Our carpet supply and install cost guide covers residential versus rental-grade pricing per square metre, and the floor replacement side of our Auckland maintenance work handles the lift, disposal and reinstall as part of the same job number.
Flooring: think about durability
If you’re replacing carpet in a Glen Innes home you bought as a first home and plan to live in for 20 years, choose for comfort and warmth. If you’re replacing flooring in a Henderson rental between tenants, choose for durability and easy maintenance — vinyl plank or commercial-grade carpet usually beats residential-grade carpet for a rental that turns over every 18–24 months.
If you might rent the home out in future (a lot of Aucklanders move into a parent’s home or relocate temporarily and end up renting their main home), think rental-grade now. The 5% extra cost in materials gets paid back the first time a tenant moves out and you don’t need to replace flooring again. We walk owners through this decision when they’re picking replacement flooring during a repair, because the grade choice is easier to make while the room is already empty.
💡 Property tip: Get your repair contractor to spec the upgrade options separately from the like-for-like quote. That way you can see the actual marginal cost of upgrading, and decide what’s worth it. If the assessor sees both quotes side by side, they sometimes approve the upgrade anyway — especially for insulation, where the long-term benefit is clear.
Plumbing: Replace the Borderline Sections
If the flood was caused by a burst pipe, there’s almost always another section nearby that’s the same age and same condition. We routinely recommend replacing the obviously-tired adjacent sections while the wall is open. The marginal cost is small, the labour is already on site, and you avoid the same call-out six months later when the next weak point goes.
Older Auckland villas with original copper or galvanised plumbing are particularly worth checking. A flood event is often the canary for ageing plumbing across the whole house.
One Network or Six Contractors: Why Multi-Trade Matters
Here’s the part nobody else will tell you, because nobody else is set up for it.
Post-flood repair is a coordination problem, not a single-trade problem. You need a builder for the structural work. A plumber for the pipes. An electrician for the wiring. A gib stopper. A painter. A flooring installer. Often a tiler if there’s a wet area. Sometimes a kitchen joinery specialist if cabinets are affected.
If you try to source each of those trades independently, you’re going to spend 20–40 hours over the next month making phone calls, chasing quotes, scheduling visits, and explaining the same story to seven different people. Some of those tradies won’t return your calls. Some will quote and then ghost you. Some will turn up two weeks late and blow the timeline. The single most common feedback we hear from Auckland homeowners after a flood repair is “I just wish I’d had one person to call.”
What the SCG trade network does differently
Superior Property Services is part of the Superior Construction Group — which means when you call us for flood damage repair Auckland, you’re getting access to the full SCG trade network in one phone call. Builder, plumber, electrician, gib stopper, painter, flooring installer, tiler, joiner. One job number. One project manager. One invoice to send to your insurance assessor.
For sister-brand work that crosses into bigger territory, a flooded kitchen where the cabinetry needs full replacement rather than minor repair being the usual one, we coordinate with Superior Renovations for the major rebuild work and Little Giant Interiors for custom joinery. From the homeowner’s side it’s still one call.
What “1 working day response” actually means
Most property maintenance companies don’t return your call for three days. Some take a week. We respond to every enquiry within one working day — usually faster. For flood damage repair specifically, where your insurance assessor is waiting on quotes and you can’t move forward until you have them, this is the difference between a repair that wraps up in four weeks and one that drags on for three months.
Call 0800 199 888 or use the quote request form. We’ll come and walk the property with you, write the scope of works, give you a single comprehensive quote your assessor can work with, and start as soon as the claim is approved.
What to look for in a flood damage repair contractor
Whether you go with us or someone else, the basics matter. Look for:
- Licensed Building Practitioner involvement for any structural work
- Registered electrician for any electrical work, with Certificate of Compliance documentation
- Registered plumber or drainlayer for any plumbing work, issuing a Record of Work for restricted plumbing work under the Plumbers, Gasfitters and Drainlayers Act 2006, plus a PS3 producer statement where the work was consented. A Certificate of Compliance is the electrical and gas document, not the plumbing one
- Public liability insurance, with a current certificate of currency you can actually read, not just a verbal assurance
- Written scope of works before any payment is taken
- Direct communication with your insurance assessor
- A single point of contact for the duration of the job
- Realistic timeline with target completion dates
If any of these are missing, walk away. The cheapest quote that comes with a tradie who can’t be reached is more expensive than a properly priced quote with a contractor who answers their phone.
Get the Repair Sorted Properly the First Time
Flood damage repair is one of those jobs where the difference between doing it right and doing it cheaply shows up two years later — usually in mould behind freshly painted walls, or warped flooring, or skirting that’s separating from the gib. The whole point of the repair is to put your home back together better than before, with the insurance claim covering as much as possible, and the work documented properly so it shows up positively when you ever sell or rent the place.
If you’ve just had a flood event in Auckland and you’re staring at a drying report from the restoration tech, we can take it from there. We’ll walk the house, write the scope, talk to your assessor, and coordinate every trade you need through one job number — flooring, gib, paint, plumbing, electrical, the lot. One call, all trades, one working day to respond.
➡ Request a free no-obligation quote from Superior Property Services
➡ Learn more about water damage repairs in Auckland
➡ Make an enquiry — we respond within 1 working day
How long does flood damage repair take in Auckland?
Most post-restoration flood damage repairs in Auckland take 2–6 weeks from the day the restoration company finishes drying. A small single-room repair (laundry burst pipe, isolated bathroom leak) typically completes in 10–14 working days. A larger multi-room repair involving open-plan living areas, kitchens, or multiple bathrooms usually runs 4–6 weeks. The timeline is driven by how many trades need to coordinate, whether structural sign-off is required, and material lead times for replacement flooring or specialist gib finishes.
What does flood damage repair actually cover?
Flood damage repair covers everything that needs replacing or fixing after the restoration company finishes water extraction and drying. This includes new gib and stopping, replacement insulation, new flooring (carpet, vinyl, laminate, or timber), repainting affected walls and ceilings, repairing or replacing damaged plumbing, electrical re-certification on affected circuits, replacing skirting and architraves, and any joinery or fittings that were damaged. It does not include the initial water extraction or structural drying — that's the restoration specialist's scope, before the repair work starts.
Does insurance cover flood damage repair in Auckland?
Most private home insurance policies in New Zealand cover sudden and accidental water damage from burst pipes, hot water cylinder failures, roof leaks, and similar internal causes. Damage from natural hazards like declared weather events may also involve the Natural Hazards Commission (NHC, formerly EQC) under the Natural Hazards Insurance Act 2023. Coverage details vary by policy — confirm with your insurer what's included and what excess applies. Your repair contractor should be willing to work directly with your assessor on the scope of works.
What's the difference between flood restoration and flood damage repair?
Flood restoration is the emergency response: water extraction, structural drying with industrial dehumidifiers and air movers, antimicrobial treatment, and removal of unsalvageable materials like wet carpet. Flood damage repair is the rebuild work that happens after restoration is complete: new gib, paint, flooring, plumbing repairs, electrical re-certification, insulation, and any joinery replacement. They're two distinct trades, and most insurance claims handle them as separate invoices.
Who do I call first after a flood in my Auckland home?
In this order: first, your insurance company to start the claim and arrange an assessor visit. Second, an emergency plumber or electrician if there's an active water or electrical safety issue. Third, a flood restoration specialist for water extraction and drying. Fourth, once drying is complete, a flood damage repair contractor or property maintenance company to handle the rebuild — gib, paint, flooring, plumbing, electrical. A multi-trade contractor like Superior Property Services can manage the repair stage end-to-end on 0800 199 888.
What should I add to my insurance scope of works after a flood?
Beyond the obvious damaged surfaces, push to include: insulation replacement for the full affected wall (not just the wet section), painting to whole walls or whole rooms (because patch-painting rarely matches), skirting and architrave replacement, electrical Certificate of Compliance fees, ventilation upgrades if extractor fans were inadequate, and subfloor treatment for villas with enclosed subfloors. A good repair contractor will help draft this scope before the assessor finalises the claim, which significantly reduces out-of-pocket costs.
Can I upgrade insulation or flooring during flood damage repair?
Yes — and this is the cheapest moment to do it. While walls are open, upgrading from like-for-like insulation to current Healthy Homes standard (ceiling R 2.9, underfloor R 1.3) usually adds $1,500–$3,500 over the base insurance-funded replacement. Doing the same upgrade later, with walls closed, typically costs $8,000–$15,000 because every wall needs to be opened and reinstated. Most insurers will pay for like-for-like and you cover the upgrade cost, but ask your repair contractor to quote both options separately.
Do I need a Licensed Building Practitioner for flood damage repair?
LBP involvement is required for any structural work — meaning anything that affects load-bearing walls, structural framing, or the building's structural integrity. Most cosmetic flood repair (gib replacement, paint, flooring, fittings) doesn't require LBP supervision. But if the flood damaged framing, bearers, joists, or any structural element, an LBP must sign off the structural repair. A qualified flood damage repair contractor will identify when LBP involvement is needed and arrange it as part of the project.
What's the Natural Hazards Commission and when does it apply to flood damage?
The Natural Hazards Commission (NHC) replaced the Earthquake Commission (EQC) on 1 July 2024 under the Natural Hazards Insurance Act 2023. NHC provides cover for residential damage caused by natural hazards including earthquake, landslide, tsunami, volcanic and hydrothermal activity, and storm and flood damage. For storm and flood the scheme's reach is largely limited to residential land rather than the building, so for most Auckland domestic flood claims (burst pipes, roof leaks, internal plumbing failures) your private home insurer handles it. NHC typically becomes relevant after major declared events. Call your private insurer first and contact NHC as well if you're unsure.
How much does flood damage repair cost in Auckland?
Costs vary significantly by scale. A single-room repair (one wall of new gib, paint, replacement flooring, minor electrical) typically runs $5,000–$12,000. A multi-room repair involving open-plan living, kitchen, and bathroom can range from $20,000 to $80,000 depending on cabinetry, flooring grade, and structural work. Most of this is usually covered by insurance for sudden and accidental water damage. Your excess and any upgrades you choose are your out-of-pocket. Request a free no-obligation quote from Superior Property Services on 0800 199 888 for a written scope of works for your specific situation.
What if the same flood happens again — is it still covered?
Most insurance policies cover repeat events provided the underlying cause was repaired properly after the first claim. If the same pipe burst again because it was patched rather than replaced, the insurer may decline or reduce the second claim on the basis of insufficient remediation. This is why the cause repair is so important — replace, don't patch. Document the repair work, keep producer statements and certificates of compliance, and your second claim (if it ever happens) sits on a much stronger footing.
Can a flooded subfloor be dried out, or does the timber need replacing?
Most flooded subfloors can be dried and saved, but only if the crawl space is cleared of silt, the ground moisture barrier is reinstated and the subfloor vents are opened up so the space can actually dry. Air movers inside the house do not dry a subfloor. Get moisture readings taken under the floor, not just in the rooms, and have them recorded. Bearers, joists or piles showing decay, splitting or settlement are structural work: that needs a Licensed Building Practitioner, and depending on scope a building consent from Auckland Council. Replace wet underfloor insulation rather than drying it, because wet batts compress and lose their R-value.
References
- Insurance Council of New Zealand — Auckland Anniversary Weekend flooding, provisional claims data
- Natural Hazards Commission Toka Tū Ake
- Building Performance (MBIE) — restricted building work and Licensed Building Practitioners
- Plumbers, Gasfitters and Drainlayers Board
- Tenancy Services — Healthy homes standards
- Tenancy Services — Insulation standard
- Tenancy Services — Ventilation standard