
Garage Insulation: What a Door Kit Adds and What Matters More
Quick answer: Garage insulation pays off most on the wall and ceiling between an attached garage and your house. Garage door kits sold in New Zealand add only R0.65 to R1.1, by their makers’ own figures.
That gap matters, because the door is the first thing most people think about. The garage is freezing, the door is a big sheet of thin steel, and a kit you can fit on a Saturday afternoon looks like the obvious fix. Sometimes it is. If you use the garage as a workshop, a home gym or a place to fold washing in July, a door kit makes that space more pleasant.
Free cost calculator
Pricing up insulation for your home?
Answer a few questions and we’ll email you an Auckland price range.
But if the real complaint is that the bedroom above the garage is cold, or the hallway next to the internal door never warms up, the door is the wrong end of the problem. Heat leaves your living space through whatever separates it from the garage: a shared wall, a ceiling, an internal door. Insulate those and it barely matters how cold the garage gets.
So before you buy anything, find out what each option actually adds, what it costs, and which rules apply. Insulating that shared wall is usually exempt from building consent, but not always. And if the house is a rental with a bedroom over the garage, the Healthy Homes Standards have something specific to say about the floor of that room.
Is Garage Door Insulation Worth It? What the Kits Actually Add
Garage door insulation in New Zealand mostly comes as a DIY kit: panels cut to fit inside each section of a sectional (panelled) door and held in place by friction or adhesive. Two New Zealand-made kits sit near the top of the search results, and both makers publish the numbers you need to judge them.
What’s in the box
Expol’s Garage Door Insulation Kit uses expanded polystyrene (EPS) sheets with liners. Expol sells it in two thicknesses: 28 mm for embossed doors and 35 mm for flat-panel doors. It lists the R-values as 0.65 and 0.85 respectively, says each kit covers approximately 5.76 m², which suits a single sectional door, and puts installation at two to four hours with basic tools.
GreenStuf takes a different approach with a polyester pad. According to the GreenStuf Garage Door Insulation datasheet, the product is 40 mm thick, comes in packs of four black slabs (1.0 m or 1.1 m by 2.45 m) that you cut to friction-fit each door section, and “adds R1.1 thermal performance”. GreenStuf also says it helps reduce reverberated noise inside the garage, which is a real benefit if the garage doubles as a gym or a band room.
| Kit | Material | Thickness | Maker’s R-value |
|---|---|---|---|
| Expol, embossed doors | Expanded polystyrene | 28 mm | R0.65 |
| Expol, flat doors | Expanded polystyrene | 35 mm | R0.85 |
| GreenStuf | Polyester pad | 40 mm | R1.1 |
Polystyrene or polyester: how the two kits differ
Once you get past the R-value, the two kits differ mostly in how they behave once fitted. Expol’s polystyrene panels are rigid, lightweight sheets with an adhesive backing, and Expol describes them as moisture resistant. Because they’re rigid, they suit a door whose panels are flat or have a regular embossed pattern, which is why Expol makes a thinner version for embossed doors.
GreenStuf’s polyester pad is soft and compressible. You cut it with a sharp box-cutter type knife so it friction-fits each section, and the datasheet says it should ideally go in with the black needle-punched layer facing into the garage. GreenStuf’s datasheet also reports moisture absorption of less than 0.03 per cent by weight after four days at 50°C and 90 per cent relative humidity, and the product carries GreenStuf’s 50-year durability warranty. The pad is made from 100 per cent polyester with at least 70 per cent recycled fibre from PET plastic.
Neither choice changes the bigger picture. Pick the one that fits your door’s panel profile and the way you’ll use the space, and keep your expectations tied to the R-value the maker prints rather than to the photo on the box.
Putting R0.65 to R1.1 in context
An R-value measures how strongly a material resists heat passing through it. The higher the number, the slower the heat gets out. On its own, “R1.1” means very little to most people, so here are two benchmarks you already live with.
The first is the law for rentals. The Residential Tenancies (Healthy Homes Standards) Regulations 2019 set the minimum R-value for underfloor insulation at 1.3, and for ceiling insulation in Auckland (zone 1) at 2.9. Every garage door kit above sits below even the underfloor minimum, and well under half the ceiling figure. That isn’t a criticism of the products. A door panel has to stay light enough to roll overhead on springs and tracks, so it was never going to hold a ceiling batt.
The second benchmark is a wall. Our published guide to insulation costs lists standard wall batts at R2.2 to R2.8 for open framing. Put an R2.2 batt in the wall between the garage and the house and you have twice the resistance of the best door kit, on the surface that actually touches your living space.
Where a door kit earns its place
We’ll tell you upfront when a kit is enough. If the garage is a space you spend time in, the door is one of its biggest uninsulated surfaces, and taking the bite off it makes the room more usable. A kit also cuts the drumming of rain and traffic on a thin steel door. For a detached garage with no shared wall at all, the door and the roof are the only places to start.
What a kit won’t do is warm the house beside it in any meaningful way. Expol’s own description is careful on this point: it says that because garages are often connected to living spaces, insulating the door “can help reduce heat loss”. That’s a fair way to put it. The door is one layer removed from your living area, and the shared wall is the layer that decides how much heat your living area loses.
💡 Property tip: Both kits are sold for sectional doors made of separate panels. Neither maker publishes an R-value or a fitting method for a roller door, so if yours rolls up into a drum, ask the door’s manufacturer before you stick anything to it.
There’s also the door itself to consider. A kit adds weight, and a sectional door is balanced by springs set for its original weight. If the door starts to drift down or feels heavier to lift after a kit goes in, have a garage door technician check the spring tension rather than living with it.
Where the Heat Really Goes in an Attached Garage
Imagine a winter evening in a 1980s brick-and-tile home with an internal double garage. The heat pump is running in the lounge, and the hallway that runs past the garage door is noticeably colder than the rest of the house. The garage door is shut, and the heat is still leaving.
It goes sideways and upwards, into the garage, through the surfaces that separate it from the house. Think of the garage as a big unheated room bolted onto your home. Anything you do to the outside of that room (the door, the external walls) only slows how quickly the garage itself cools. What you do to the shared surfaces decides how much of your heating bill ends up warming a car.
The shared wall
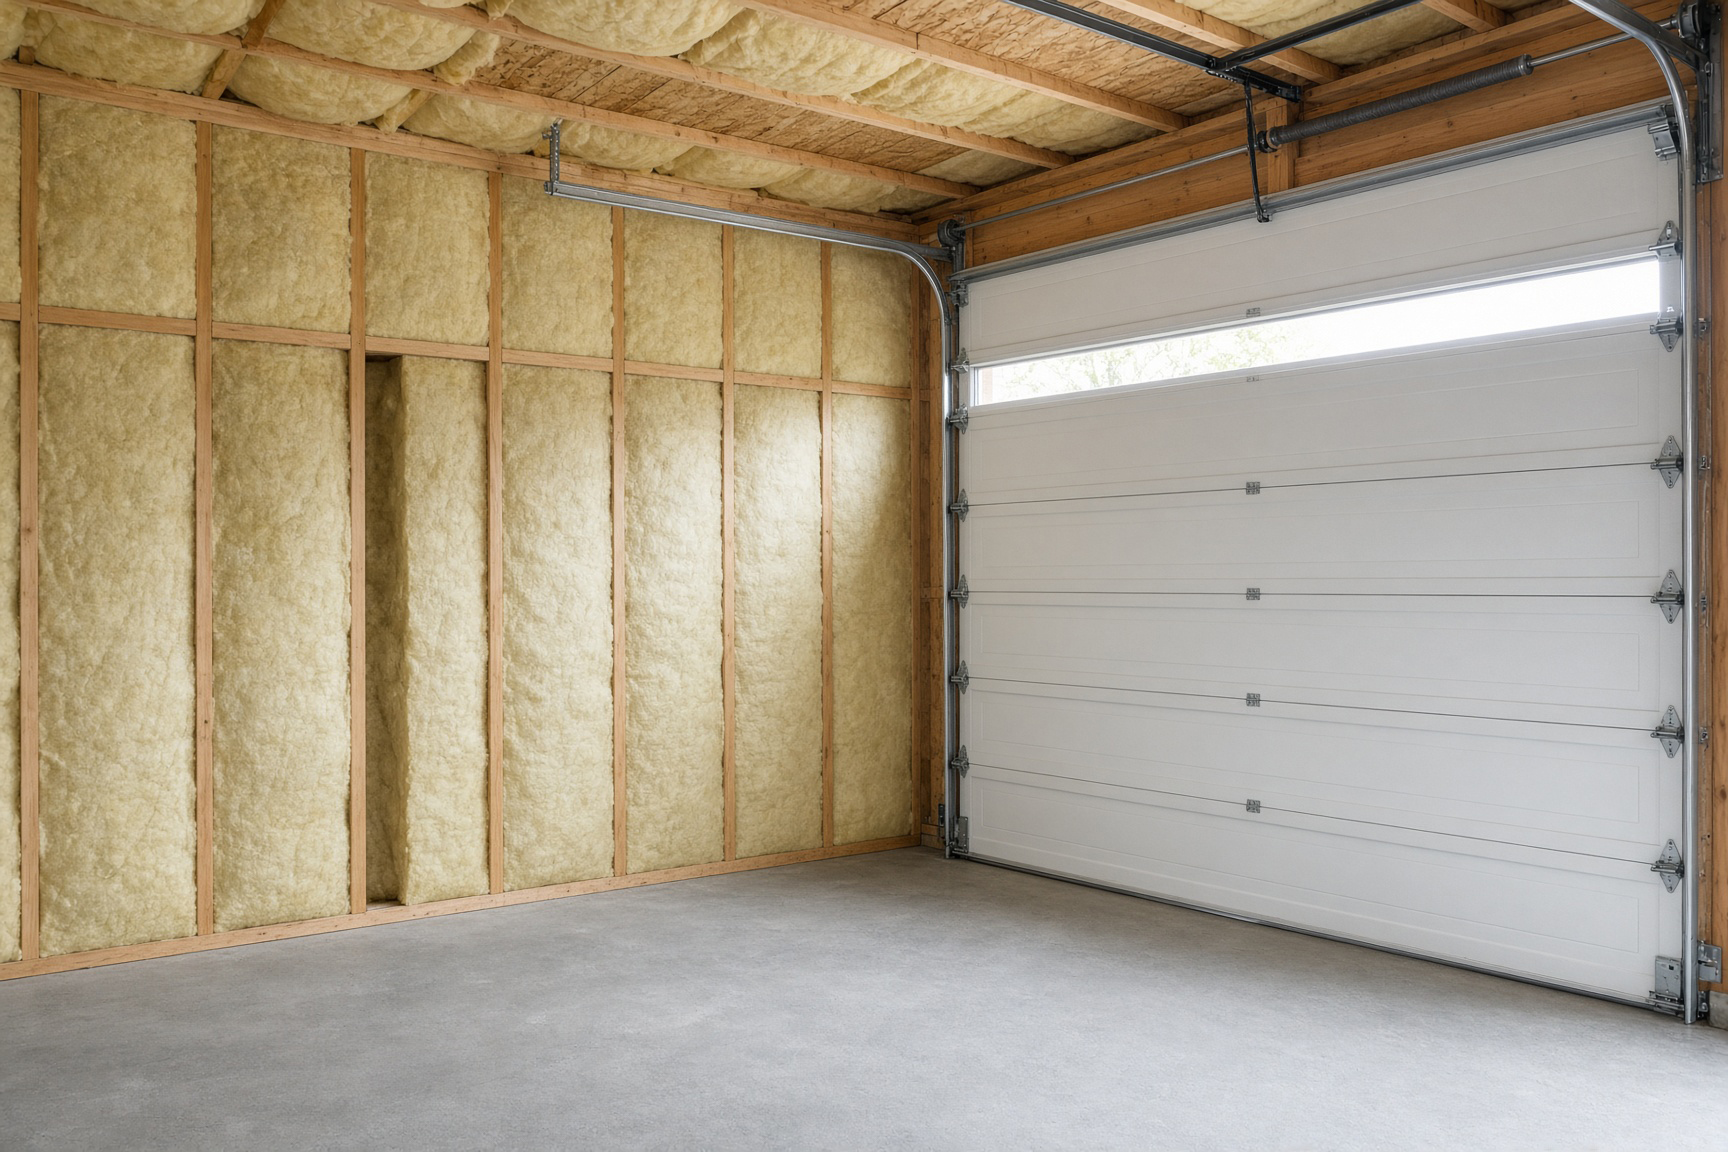
Have a look at the wall between the garage and the house from the garage side. In some attached garages that side of the wall was never lined, so you can see the studs, the nogs and the back of the gib on the house side. If you can see bare framing, that wall can usually be insulated with ordinary wall batts pushed between the studs, without touching the finished side inside the house. It’s one of the simpler jobs our insulation installers handle around Auckland homes.
That’s the same open-framing job our cost guide prices for walls that are already open during a renovation, and it costs less than the closed-wall options in the same guide, because nobody has to remove and reinstate linings to get at the cavity. Once the batts are in, many owners line the garage side with gib or another sheet material to protect the insulation from knocks and keep the space tidy.
If the garage side is already lined, the job is harder. The options are the same as for any closed wall: remove the lining, fit batts and re-line, or have the cavity injected. Our guide covers both, and the injected method is the least disruptive way to fill a cavity you can’t open.
💡 Property tip: Before anyone fits batts into a shared wall, check for wiring and pipes running through the framing. Tell your installer about anything you know is in there, so the batts go in around it rather than over it.
The ceiling under a bedroom
Plenty of Auckland homes have a bedroom or a rumpus room sitting directly over the garage. Newer three-storey townhouses often stack the garage on the ground floor with bedrooms above, and split-level homes on sloping sections do the same thing with a garage tucked under the main floor.
In that layout, the garage ceiling is the floor of the room above. If that cavity is empty, the bedroom is effectively sitting on a suspended floor over an unheated space, which is exactly the situation underfloor insulation exists to fix. It just happens that the space underneath is a garage rather than a crawl space.
Getting insulation into that floor is a different job from a crawl space. If the garage ceiling is unlined, batts can go up between the joists from below and be held in place before a ceiling goes on. If it’s already lined, there’s usually an access question to solve first: a hatch, or taking down part of the lining. That’s why we price these on site rather than off a per-square-metre rate.
The internal door
The third leak is the simplest. An internal door between the garage and the house is often a standard interior door, with a gap underneath and no seal around the frame. Cold air from the garage pushes through those gaps every time the temperature difference builds up.
A draught strip around the frame and a seal at the bottom of the door are cheap, quick and often the first thing to do. They won’t turn a hollow-core door into an insulated one, but they stop the air movement, and air movement is what you feel as a draught in the hallway. Is the door old, warped or damaged? Then replacing it with a solid door is a sensible upgrade while you’re at it.
Detached garages are the exception
Everything above assumes the garage is attached. A detached garage shares no wall, ceiling or door with the house, so insulating it does nothing for your heating bill and everything for the garage itself. There, the order flips: the roof space and the door are the obvious places to start, and a door kit plus ceiling batts is a sensible pairing if you use it as a workshop or studio.
Be honest with yourself about how often that is. A detached garage used for a car and a lawnmower doesn’t need insulating at all. One used every weekend as a workshop, or as a home gym through winter, is a different story, and that’s where the kits are genuinely good value for the time they take to fit.
Garage Insulation and Building Consent: What Clause 13 Says
Garage insulation sits under the same consent rule as any other insulation in an existing home, and that rule is short enough to read in full. Most people are told “insulation doesn’t need consent” or “walls need consent”, and both are half right.
The exemption, word for word
Schedule 1 of the Building Act 2004 lists building work that doesn’t need a building consent. Clause 13 exempts “building work in connection with the installation of thermal insulation in an existing building other than in (a) an external wall of the building; or (b) an internal wall of the building that is a fire separation wall (also known as a firewall).”
Read that against an attached garage. The wall between the garage and the house is usually an internal wall, because the garage is part of the same building. Insulating an internal wall that isn’t a firewall falls inside the clause 13 exemption. The garage’s outside walls are external walls, so insulating those does not. Neither does a shared wall that is a fire separation wall, which can be the case where a garage adjoins a separate dwelling.
Insulating the ceiling of a garage, which is the floor of the room above, isn’t an external wall or a firewall either, so it sits inside the same exemption. A garage door kit is a product fixed to a door, not insulation in a wall, which is why nobody asks for consent to fit one.
What the exemption doesn’t cover
An exemption from consent isn’t an exemption from the Building Code. The work still has to comply, and the clause only covers the insulation. Anything you do alongside it is judged on its own terms. Lining a garage, moving an internal door or changing what the room is used for are separate questions from putting batts in a wall.
Compliance note: Whether a particular wall is an external wall or a fire separation wall, and whether any work alongside the insulation needs a building consent, is a call for a Licensed Building Practitioner or Auckland Council. Check with them before work starts if you’re unsure.
Can you do it yourself?
A door kit is designed as a DIY job, and both makers say so. The shared wall is also within reach for a capable owner when the framing is open: batts are sized to sit between standard stud spacings, and nothing in the clause 13 exemption requires a licensed person to fit them. The catch is everything else in that wall.
Look for cables, switch boxes, power points and pipes before you start. Wiring and plumbing in a wall are regulated trades in their own right, so if anything needs moving or protecting, that’s a job for a registered electrician or plumber rather than something to work around with a knife. Wear gloves, long sleeves and a dust mask when cutting and handling batts, whatever the product.
The ceiling under a bedroom is the part we’d suggest leaving to an installer. Working overhead between joists, holding batts in place and dealing with an access hatch or lining is slower and more awkward than it looks, and the finished ceiling has to look right from the garage floor. We handle these as part of our insulation work, with the electrician from the same network on hand if a light or cable is in the way.
Converting the garage is a different job
Insulating a garage that stays a garage is maintenance-scale work. Turning it into a bedroom, an office or a sleepout is not. That’s a renovation, with its own design, consent and Building Code questions that go well beyond insulation. If that’s where you’re heading, our sister company Superior Renovations has a page on converting an Auckland garage into living space that covers the full job.
New builds are different again. A new home is designed to the energy efficiency clause of the Building Code, H1, which sets its own insulation levels for walls, roofs and floors. Sonder Architecture’s guide to the current H1 insulation rules explains how that works if you’re building rather than retrofitting.
💡 Property tip: If you’re insulating the shared wall now and might convert the garage later, say so when you get a quote. It can change what lining goes on the garage side, and it saves pulling work out a second time.
What Insulating a Garage Costs in Auckland
The honest answer depends on which surface you’re insulating, because each one is a different job. Our cost guide publishes per-square-metre ranges for the jobs that have one, and we can build most of a garage estimate from those without inventing anything.
Our published guide ranges
These figures come straight from the same insulation cost guide. They’re our published guide ranges for supply and installation in Auckland, not a quote for your garage.
| Job | Typical product | Our published guide range |
|---|---|---|
| Shared wall, framing open on the garage side | R2.2 to R2.8 wall batts | $13 to $22 per m², materials and labour |
| Shared wall, lined on both sides | Injected (blown-in) fill | About $15 to $30 per m² |
| Roof space over a garage with no room above | Ceiling batts | $11 to $40 per m² installed |
| Garage ceiling under a bedroom | Batts between the joists | No published range: quoted on site |
A worked example for a shared wall
Say the wall between your garage and the house is 6 m long and 2.4 m high, with the framing open on the garage side. That’s 14.4 m² of wall. At our published guide range of $13 to $22 per m², the insulation itself works out at roughly $187 to $317. That’s our working on our own published rates, not a quote.
Two things move the real number. First, a fixed quote covers the whole job, including getting a tradesperson and materials to site, so a small wall is priced as a job rather than by its square metres alone. We take on small jobs, and pairing the wall with other insulation or maintenance work in the same visit makes the trip go further. Second, lining the garage side afterwards is a separate cost. The batts are the cheap part; the lining is usually the bigger line on the invoice.
Compare that with the door. A single sectional door is about 5.76 m² by Expol’s coverage figure, so a kit insulates less than half the area of that wall, at a quarter to a half of the R-value of a wall batt. We don’t quote retail prices for the kits, so check current prices with the stockist.
Lining the garage side
Once the batts are in an open wall, the garage side needs a cover. Standard plasterboard is the usual choice. It gives a clean, paintable finish and protects the insulation from bikes, tools and car doors. In a workshop or a garage that gets knocked about, a tougher sheet can make more sense. The choice affects the price more than the insulation does.
We don’t publish a per-square-metre rate for lining a garage wall, because the finish you want changes the job: a plain sheet screwed off, or stopped and painted to match a room. We price it on site with the insulation, as one fixed quote.
Why the ceiling under a bedroom has no rate
We don’t publish a figure for insulating a garage ceiling under a living space, because the cost is decided by access. An open, unlined ceiling is a straightforward job from a stepladder. A lined ceiling might need a hatch cut or a section of lining taken down and reinstated, and possibly painting afterwards. Each of those is a different amount of work, so we look at it first and give you a fixed quote before any work starts.
💡 Property tip: When you compare quotes, ask each one to state the R-value and the product by name for every surface. Two prices for “insulating the garage” can be for completely different jobs, one doing the door and the other doing the wall.
If you’d rather start with numbers for the whole house, our insulation calculator asks a few questions about the job and emails you an Auckland price range. The exact price is then confirmed with a free on-site assessment.
For Landlords: Garages, Rooms Above Them and the Healthy Homes Standards
If the house is a rental, the garage question has a compliance side. The Healthy Homes insulation standard applies to the parts of the home people live in, and the wording repays a close read, because a garage changes how two of the rules apply.
Healthy Homes compliance note: We do the physical insulation and draught-stopping work. Whether a particular rental complies with the Healthy Homes insulation standard is a question for Tenancy Services, not for us, and the notes below are a reading of the regulation text rather than advice on your property.
The garage itself
Regulation 13 of the Healthy Homes Standards Regulations says the ceiling of “each domestic living space” must be fully covered by qualifying ceiling insulation, and regulation 15 says the same for the suspended floor of a domestic living space. The regulations define a domestic living space as “an interior space of a building that is a space for activities normally associated with domestic living”. A garage used for parking and storage isn’t the space the standard is written around, which is why you won’t find garage doors or garage walls anywhere in it.
A bedroom over the garage
The room above is a different matter. Regulation 15 requires the suspended floor of a domestic living space to be fully covered by qualifying underfloor insulation, at least R1.3. The only living-space carve-out is where “another domestic living space” is immediately below the floor, and a garage below is not one. So on the wording, a bedroom floor over an unheated garage needs the same attention as a bedroom floor over a crawl space. Tenancy Services has the final say on how it applies to your property.
There is an exemption where installation isn’t reasonably practicable. Regulation 19 lets a floor stand without insulation if it was non-compliant at the start of the tenancy and it isn’t reasonably practicable to install insulation, and that exemption ends if installation later becomes practicable. Regulation 4 sets the test: a professional installer can’t get access without substantial building work or substantial damage, can’t install it without greater health and safety risks than are normally acceptable, or it is otherwise not reasonably practicable for a professional installer.
A lined garage ceiling doesn’t automatically meet that test. Tenancy Services’ insulation guidance is direct on the point: “cutting an access hatch doesn’t count as major building work.” If a hatch would let an installer reach the cavity, expect the exemption to be hard to rely on.
Timing the work in a tenanted property
You don’t have to wait for a vacancy to do Healthy Homes work. Section 48(2)(cb) of the Residential Tenancies Act 1986 lets a landlord enter for the purpose of complying, or preparing to comply, with the healthy homes standards, between 8am and 7pm on any day, after giving the tenant notice of the intended entry and the reason for it at least 24 hours beforehand.
That said, insulating a ceiling over a garage means a tradesperson working in the garage, possibly cutting a hatch and moving stored belongings out of the way. It goes more smoothly with the tenant’s cooperation, or during a turnover when the garage is empty. Regulation 19 also matters here: an exemption for a floor that couldn’t practicably be insulated ends if installation later becomes practicable during the tenancy, so a lining that comes down for another reason is a good moment to fit insulation.
The internal door and draughts
The draught stopping standard is the other one to check. Regulation 26 requires the premises to be free of gaps and holes that aren’t intentional parts of the construction, allow draughts into or out of the premises, and are unreasonable. Size, location, the extent of the draught and its effect on heat loss all count. The Tenancy Services draught page notes there’s no set maximum gap for doors, but a door gap that causes a noticeable draught must be stopped.
An internal garage door with daylight under it is an easy thing to fix during a turnover, alongside the bedroom floor over the garage if that’s in scope. We can do both in one visit as part of our Healthy Homes work, and the paperwork side stays with you and Tenancy Services.
💡 Property tip: Keep the product name, R-value and installer’s details for any insulation fitted over a garage. Good records make the compliance statement easier to complete and answer the obvious question about a rented room over a garage.
The Order We’d Do It In
If you want a warmer house rather than a warmer garage, start where the garage meets your living space. Seal the internal door, insulate the shared wall while the framing is open, and sort out the floor of any room above. Those three jobs work on the surfaces that leak your heating. A door kit comes after that, and only if you use the garage as a room in its own right.
That’s the kind of single, practical job Superior Property Services is set up for: one call, the right trade, and a fixed quote before any work starts. There’s no minimum job size, so a single wall is as welcome as a whole house; call us on 0800 199 888 or use the links below. If it turns into something bigger, like a full conversion, we’ll point you to the right part of the group. We cover the whole job as part of our small-job service for owner-occupiers across Auckland.
➡ Request a free no-obligation quote from Superior Property Services
➡ See how we insulate walls, ceilings and floors around Auckland homes
➡ Make an enquiry — we respond within 1 working day
Is garage door insulation worth it in NZ?
It depends on how you use the garage. If it is a workshop, gym or laundry space, a kit makes it more comfortable and quieter. If you want the house warmer, the wall and ceiling between the garage and your living space matter more, because door kits add only R0.65 to R1.1 by their makers' figures, while standard wall batts are R2.2 to R2.8.
What R-value does a garage door insulation kit add?
Expol lists its kit at R0.65 for the 28 mm version made for embossed doors and R0.85 for the 35 mm version made for flat doors. GreenStuf says its 40 mm polyester garage door insulation adds R1.1. For comparison, the Healthy Homes minimum for underfloor insulation is R1.3 and for ceiling insulation in Auckland is R2.9.
Do I need building consent to insulate a garage wall?
Usually not for the wall between the garage and the house. Building Act Schedule 1 clause 13 exempts insulation in an existing building except in an external wall or an internal wall that is a fire separation wall. Insulating the garage's outside walls does need consent. Check with an LBP or Auckland Council if you are unsure which kind of wall you have.
How much does it cost to insulate a garage wall?
Our published guide range for wall batts in open framing is $13 to $22 per square metre, materials and labour. A 6 m by 2.4 m shared wall is 14.4 square metres, roughly $187 to $317 for the insulation on our own working. Injected fill for a wall lined on both sides runs about $15 to $30 per square metre. Lining and minimum charges are extra.
Should I insulate the garage ceiling?
If there is a bedroom or living room above the garage, yes: that ceiling is the floor of the room above and loses heat into an unheated space. If the garage has only a roof space above, ceiling batts slow how fast the garage cools but do less for the house. A ceiling under a room is quoted on site because the cost depends on access.
Can you insulate a roller garage door?
The common New Zealand kits are made for sectional doors with separate panels. Neither Expol nor GreenStuf publishes an R-value or fitting method for a roller door, and a roller door winds into a drum, so added material can affect how it runs. Ask the door manufacturer before fitting anything, or focus on the shared wall instead.
Do rentals need garage insulation under the Healthy Homes Standards?
The insulation standard applies to the ceilings and suspended floors of domestic living spaces, so a garage used for parking is not what it is written around. A bedroom over a garage is different: regulation 15 only excuses a floor with another domestic living space directly below. Tenancy Services decides how the rules apply to a particular property.
Does a garage door kit make the door heavier?
Yes, any kit adds some weight, and a sectional door is balanced by springs set for its original weight. If the door drifts down, feels heavier to lift or the opener strains after a kit goes in, have a garage door technician check the spring tension. Leaving an unbalanced door as it is puts extra strain on the springs and the opener.
Do I need consent to convert my garage into a bedroom?
Converting a garage into living space is a renovation, not an insulation job, and it raises design, consent and Building Code questions of its own. Talk to Auckland Council or a Licensed Building Practitioner before you start. Our sister company Superior Renovations handles garage conversions across Auckland, from the design through to the finished room.
What should I insulate first in an attached garage?
Start with the surfaces between the garage and your living space. Seal the internal door, insulate the shared wall, then deal with the floor of any room above. Those three jobs keep heat in the house. Insulate the garage door after that if you use the garage as a room in its own right.
Related guides
- What ceiling, underfloor and wall insulation costs across a whole Auckland house
- Keeping your heat pump working well through an Auckland winter
References
- Expol, Garage Door Insulation Kit (product page)
- GreenStuf, Garage Door Insulation (product page and datasheet)
- Building Act 2004, Schedule 1 clause 13 (legislation.govt.nz)
- Residential Tenancies (Healthy Homes Standards) Regulations 2019, regulations 3, 4, 13 to 16, 19 and 26 (legislation.govt.nz)
- Residential Tenancies Act 1986, section 48(2)(cb) (legislation.govt.nz)
- Tenancy Services, Insulation standard
- Tenancy Services, Draught stopping standard